Menu toggle

8000 rpm 3.2 engine?


Spent hours this afternoon doing the rings which are going well with a few niggles but found a real problem (of course).

Positives of the Day:
Gapped the rings using Peter's grinder which works a treat. This grinder is a luxury compared to needle files. You made me smile Peter!
icon_smile.gif

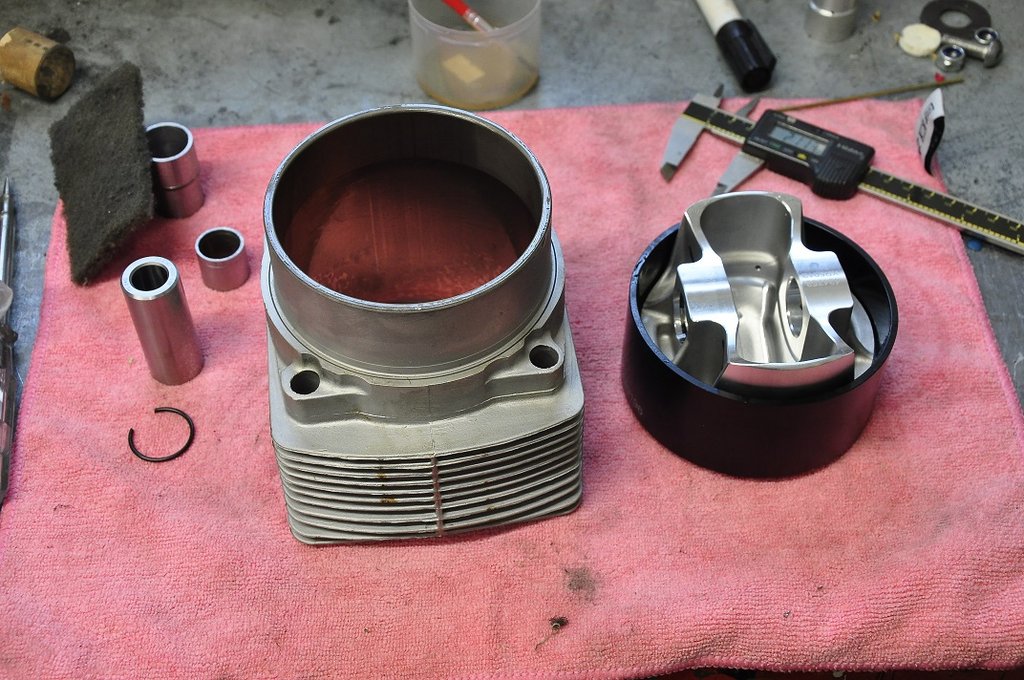
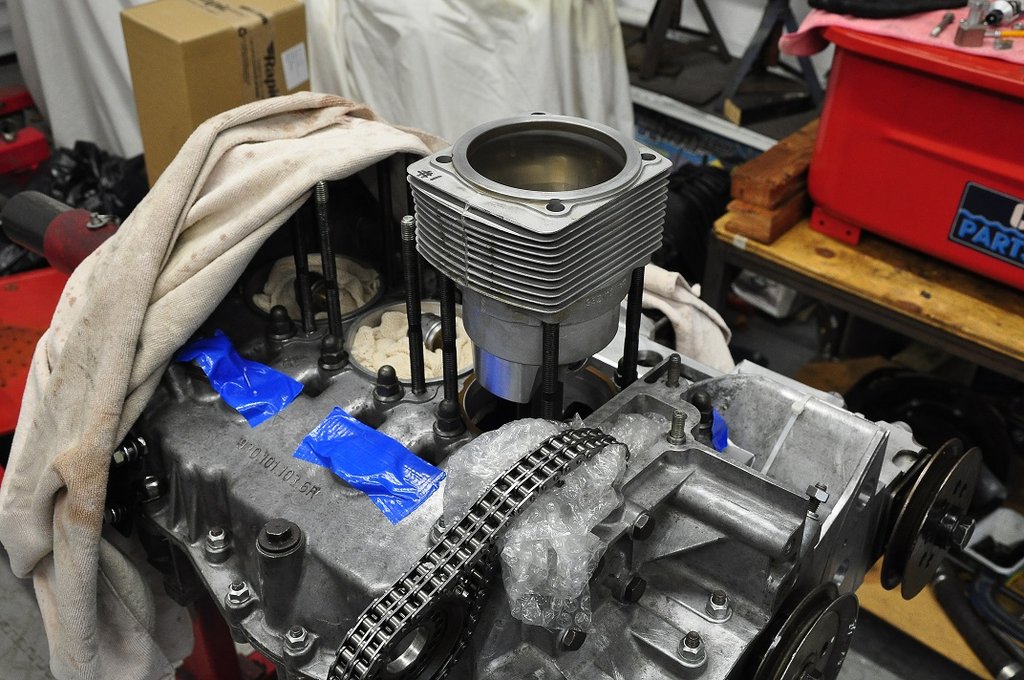
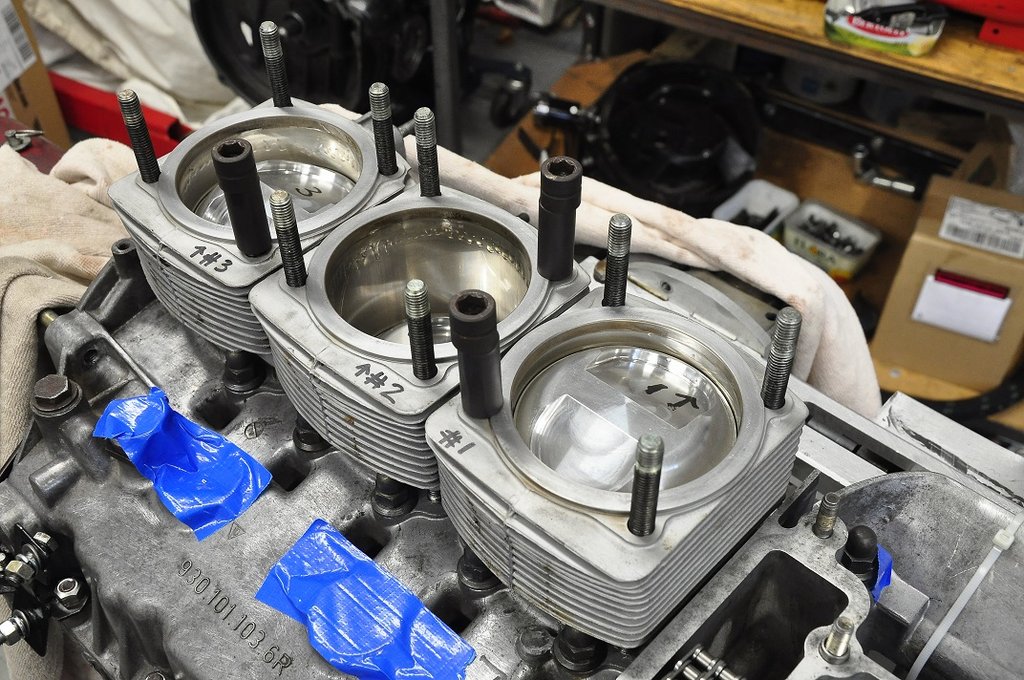
One piston at a time matched to the barrel. Done 4 , 2 to go. All gaps were too tight, so managed to tweak then bang on.
Top ring has to be 17 thou, second ring 6 though wider, so 23 thou.
Generally the top ring as supplied was 12 to 15 thou and the second 18 max.

The real sod is getting the oil control ring set in, what a game but my skill is getting better with practice and no swearing. Patience is not my middle name but you just have to take your time.

Negative of the Day:
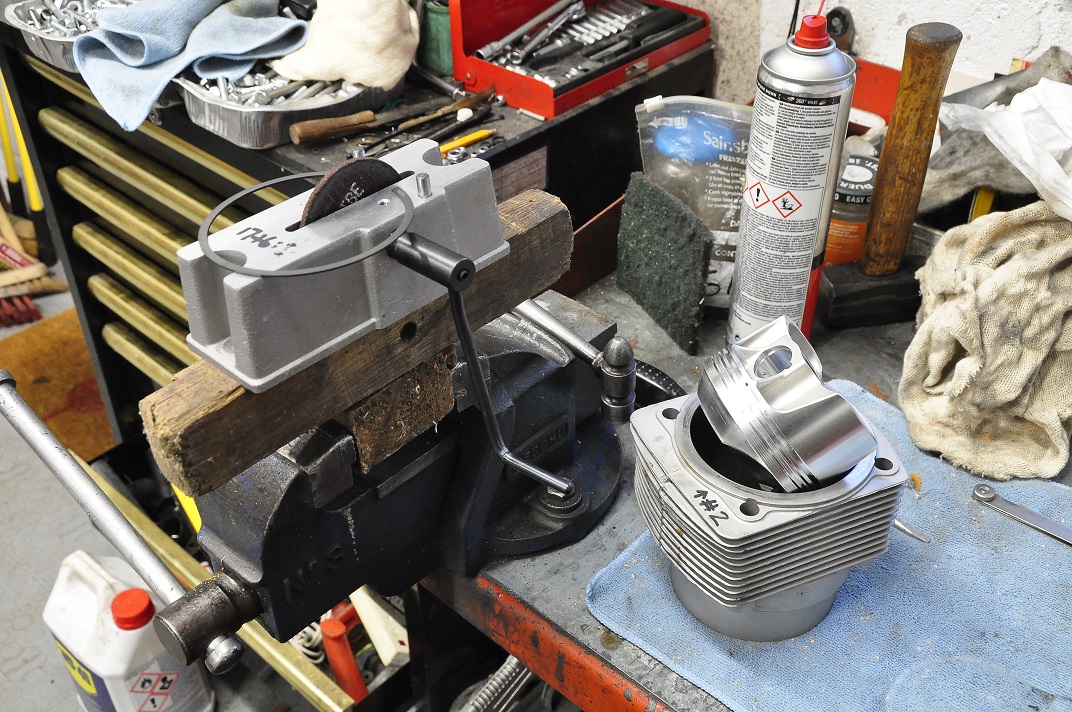
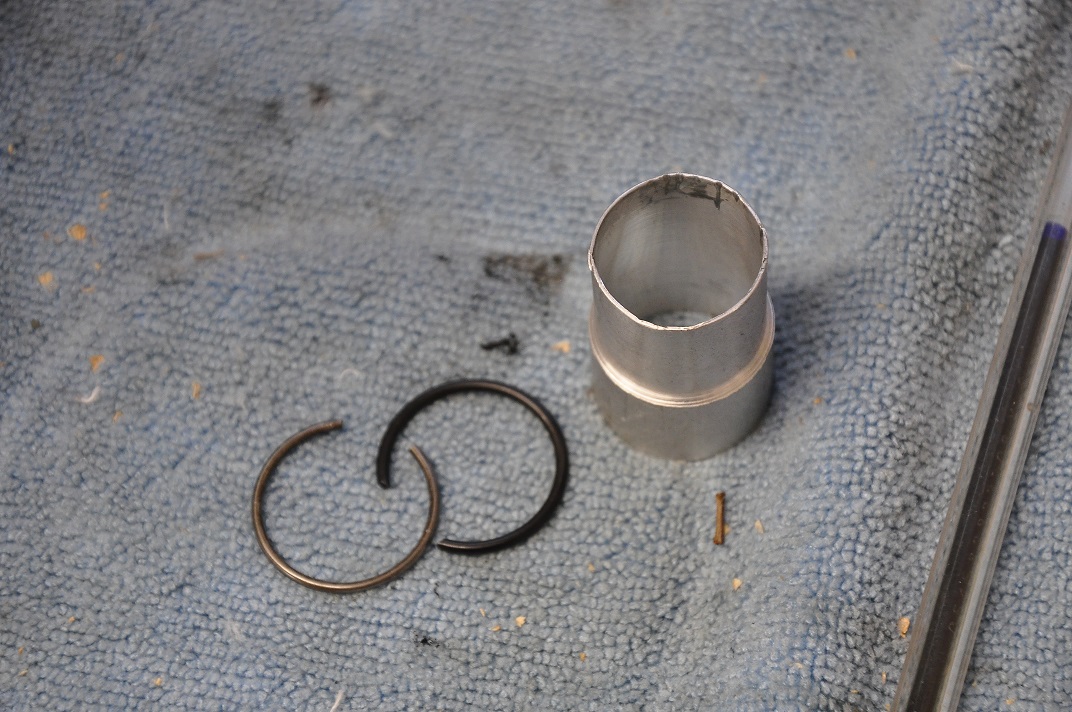
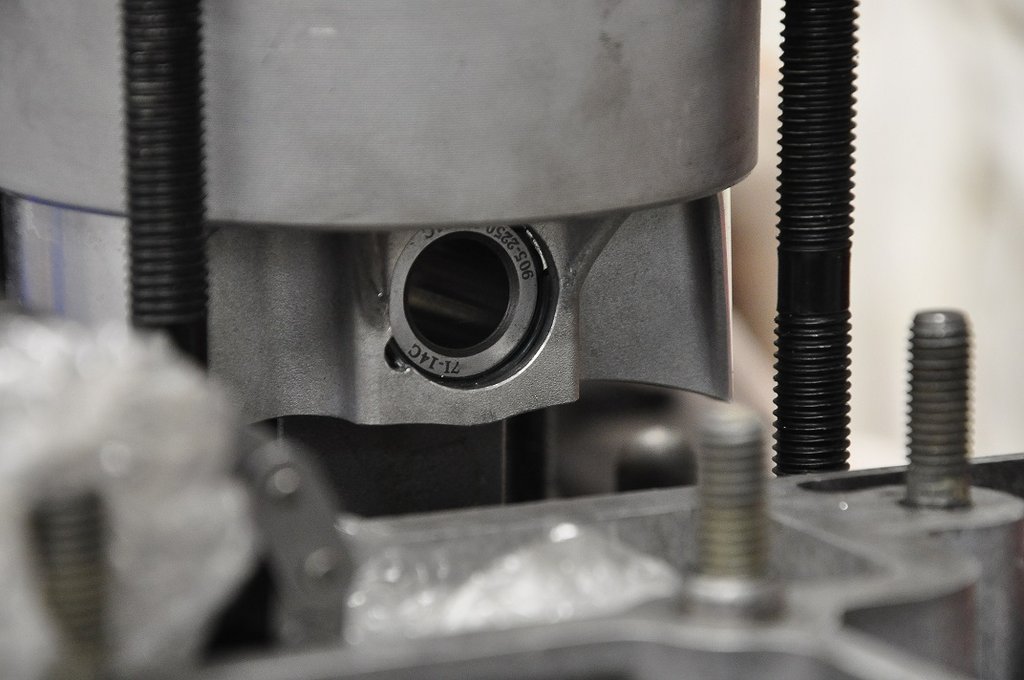
The C clips to retain the wrist pins are HUGE compared to the Porsche items. So thick and REALLY difficult to get into the piston grove.
My home made (from soft duralumin) was ovalized by the resistance to fit the clip. I did get one in place but silly effort.

Asked the piston supplier if the clips were correct and they are. He wished me luck.

There is no way you an fit these clips when assembling the engine using fingers and a screwdriver. I know I can fit 6 beforehand but they are murder with the piston in a vice!

Going to remake my Stompski knock-off tool in steel and see if that works. I doubt the Stompski tool would grapple with these clips.

The bad weather continues here, so should get Saturday to finish the cylinders and a bit more. Doubt my steel will arrive.
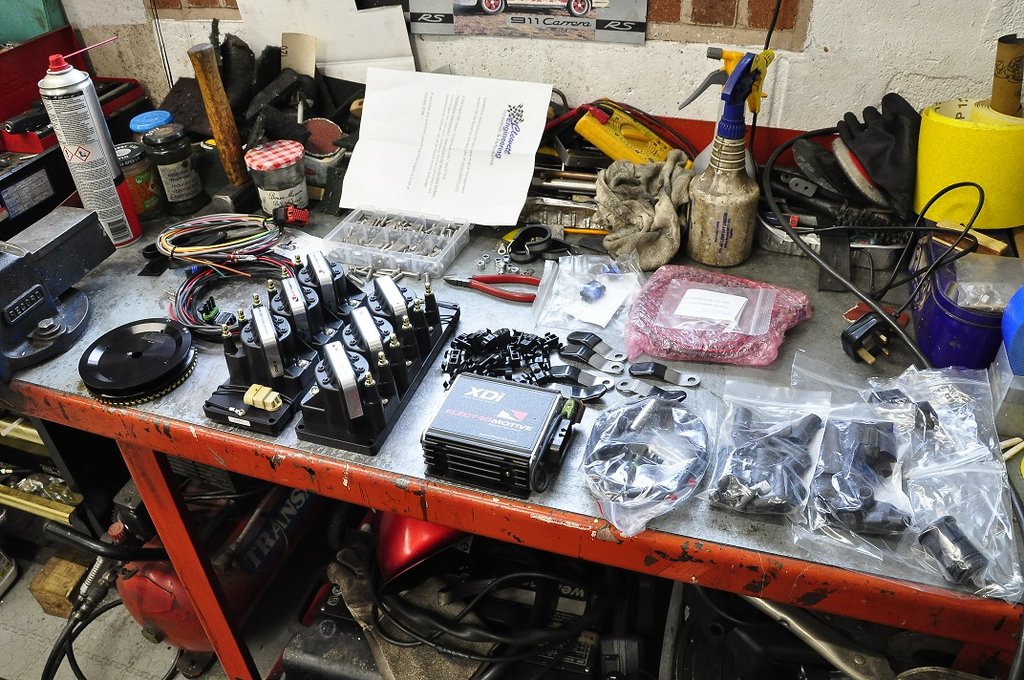
Will also contact the rolling road man to see how he feels about th Clewett ignition system, the simple (cheap) one.
It should at least bolt on and work, right?


A full 6 hours in the garage today, and much done.

The 6 piston clips were irritating me, so assembly of the pistons/barrels/clips etc weighed heavy on my mind through last night.

Still, all went well!!!

I tuned my Stomski knock off tool and all 6 nasty clips went click into place. Amazing to say the least.
The trick is to machine the outer sleeve to 5 thou smaller than the wrist pin, machine the inside dia as thin as you dare go and still have some wall thickness, I got down to 15 thou.
Press painfully these thick wire clips in, tilt at an angle and get the open ends into the piston groove, mostly done blind, adds so much to the fun.

All in and the cylinder down and clamped in place.

The ring compressor is unbelievably good, never will I use anything else.
Oil ring gaps at 12 noon, second ring gap at 9.00 and the top at 3 o'clock.

Buoyed by this lot, carried on.

Heads on after a final clean of the mating surfaces yet again, all loosed on, barrel nuts greased with assembly lube from ARP and loosed down. Cam carrier prepped, oil tubes in and torqued down a treat followed by the head torques.
Cams install ok and rotate a treat on both sides.

Slowly all the holes are filling up!

Out walking tomorrow for some Shropshire air and hope to shim the cams and even time them on Thursday.
Rocker shaft seals arrived today.
Ordering the Clewett ignition tomorrow.


Excellent progress Graham … nearly there! That ring gap grinder’s a neat piece of kit.

Enjoy the day off, although unfortunately it looks as though there’s going to be a lot of fog around. ??


Jeff


Never mind these 0.015 " wall thickness's on your drift,I am totally impressed by the "Manchester " spanner resting on your benchtop.
:ROFLMAO:
 
No! That's called a Brummies screwdriver! (I was bought up in Birmingham, so qualified to say that and use the lump hammer at times...)


More hours poured into this engine, but good progress!

The chain sprockets needed aligning esp with new cams, and the alignment was miles out with shims where they were last time.
Frustratingly awkward to get all the dimensions accurately measured and sorted. Had to make a shim for the one side as I used all the others up. Having a lathe is a god send.

All done and with in the factory tolerance.

Then to the cam timing which again is a fiddle and lots of iterations to get to the 5mm timing dimension.
Then came doing the cam bolts to 84 lbft which is easier said than done
The cam restraining tool I made worked a dream and I just about had the pull to click on 84. Awkward with the engine balanced on the stand.

All done, so moved on to the chain tensioners and found the engine was missing some spacers to stop the idlers floating along their pivot shafts.
So, turned to the lathe and machined a pair and all is well, side play of 8 thou.

To feel better, added the cam covers!

So pleased to have all that behind me now, simple stuff next, but dreading all those RSR seals.


Indeed, mine is a gorgeous Drummond from 1937, smaller than a Myford (who bought out Drummond post war) but it is wonderful.
So very very useful.
 
Good work Graham! There’s a surprising amount of detailed "fitting” required on the engine.

Just to ask but presumably the cam timing is based upon 5mm lift on say the No.1 inlet valve with the crank N-deg BTC? How is the adjustment achieved … no vernier adjustment visible, just chain link on cam sprocket?

Jeff
 
There is a very fine adjustment that is very positive to use.
You time the cams 5mm by the time the engine has turned 360 after TDC.
To get this right (5mm +/-0.2mm) you index the sprocket on the cam, and the cam has a 'toothed' cog on it with a different number of holes in it to the sprocket holes, so you index the sprocket with the engine at TDC (both valves on the heels of their lobes) by one hole (awkward to do), a 6mm dia pin lock the sprocket to the cam wheel.
Big bolt back on and turn the crank again aiming for 5mm at 360 after TDC. all done using the inlet valve only on each side.

There can be a lot of iterations of this lot per side to get it bang on at 5mm.

As you say, a lot of 'fitting' on these air cooled engines.
A rebuild can be north of £20K, easy to see why.
Add custom parts and away you go!
 
few more hours doing the simple stuff on this engine before the next challenge of the ignition system.

The oil lines are all in, simply cleaned and new alum alloy seal washers everywhere, nice and simple.
The custom made fan shroud next after a re-paint. This is a master class of thin aluminium sheet formed and rivetted to go around the engine, made by Crispin Manners I think about 25 years ago.
Followed by the DIY paper gaskets and insulators and finally the carbs.
Gave the carbs a good external clean down, been 5 years since they had some tlc. These are a sod to fit due to the two nuts on the middle cokes where they bolt to the heads, access is certainly limited, but all on using K nuts.

Next will be making the stands for the Clewett ignition coil packs which I intend to mount on the engine front cross beam a cut-n-shut 911 item.

No news from Clewett on delivery (story of USA parts for me) but could be next week..maybe.


Clewett box arrives tomorrow, so have been detailing the engine to get the system wired-up.

The lower rocker covers need mods to get access to the extra plugs, so holes drilled, webs trimmed to allow the plug cap boots to fall flat and seal to the covers, additional support brackets added to keep the plug cap in the right position and a few other things.

When I first built this engine in 2009 (!) I added turbo bottom covers, bought from Andylightweight and one had been drilled for twin plugs, so I had a good template after checking dimensions.
This all took many hours, oh for a nice milling machine!

The Clewett comes with 2 x 3 coil packs that have to be mounted somewhere; some space was found and a custom light bracket made and bolted to the engine using holes already on the cam sprocket cover. I hope this will slightly hide away the modern look on the engine, will find out soon...

This is the last big task on this rebuild, but I'm not looking forward to all the wires and good routing. About 15 meters needed!

As famously quoted, "What can possibly go Wrong?"


After some faffin' about with FedEx, the Clewett box arrived. Heavy comes to mind!

Opened it all up to check everything is there, looked good.
Started to assemble the parts on the engine, looked good.
Fitted some looms that were ready terminated and worked out some routing to suit the car and how the current loom runs, looked good.
Crank wheel and sensor dropped into place once a small corner of the engine mount was trimmed off, looked good.

Wedding anniversary day today, but Mrs HC insisted we waited in to get this box grounded, so out in the Boxster tomorrow.
Forgotten what the 911 even looks like, been in storage for an age now, but all dry and warm.

Next step is the horrid bit, running all 12 plug leads to the plugs.

On the subject of plugs, added the spacer crush washers to space the Iridium plugs back a bit, gained 1mm, but feels more comfortable.
Gapped the plugs to 0.9mm gap, the correct gap for this level of tune.

Rapidly getting there unless the crimping tool fails.

Have to say, the Clewett product quality so far is 100% on the spot.
alien.gif


Having a few days away totally in the Cotswolds has improved mu mojo, so spent the day continuing to 'wire' this 12 plug engine.

Neat n Tidy was the mantra, but also trying hard to keep these leads separated and away from the engine, no easy task.
Armed with a gazillion clips I used some spare orange 2 core 240V cable to help me plan the routes, and it is stiffer though at 7mm dia smaller than the real lead cable which I will use.
It is surprising how many unused tapped holes there are on this engine so managed to do it all without drilling the engine (!)

I think the pics say more than my clumsy words can.

Rocker cover bolts modified to carry the insulating cable clips:


Left hand side with all the routes sorted:


Right had side much harder:


This engine has to go in the chassis first and the front support bar slipped into place and onto the engine, so some of the looms has to be removable, rest is all 'on-board'.

Have bought a substantial crimping tool off ebay to crush the steel (!) coil pack terminals to the leads, and have ordered some spare ones for those I will cock-up.....

Expecting to have all the leads cut to length and in place by end of the weekend.

Also expecting to have the engine back in the car, box on with a fresh clutch friction disc and the 'ecu' in place somewhere in the cabin.
That means some fiddly wiring, not my favourite task.

Start-up getting close.
icon_eek.gif

 
As usual I’m very impressed by the quality of your work ??.
Assuming everything goes to plan I guess it’ll be seen ‘on the hills’ sometime this season, have you any idea yet which events you’re hoping to enter?
 

Posts made and opinions expressed are those of the individual forum members

Use of the Forum is subject to the Terms and Conditions

Disclaimer

The opinions expressed on this site are not necessarily those of the Club, who shall have no liability in respect of them or the accuracy of the content. The Club assumes no responsibility for any effects arising from errors or omissions.

Porsche Club Great Britain gives no warranties, guarantees or assurances and makes no representations or recommendations regarding any goods or services advertised on this site. It is the responsibility of visitors to satisfy themselves that goods and/or services supplied by any advertiser are bona fide and in no instance can the Porsche Club Great Britain be held responsible.

When responding to advertisements please ensure that you satisfy yourself of any applicable call charges on numbers not prefixed by usual "landline" STD Codes. Information can be obtained from the operator or the white pages. Before giving out ANY information regarding cars, or any other items for sale, please satisfy yourself that any potential purchaser is bona fide.

Directors of the Board of Porsche Club GB, Club Office Staff, Register Secretaries and Regional Organisers are often requested by Club members to provide information on matters connected with their cars and other matters referred to in the Club Rules. Such information, advice and assistance provided by such persons is given in good faith and is based on the personal experience and knowledge of the individual concerned.

Neither Porsche Club GB, nor any of the aforementioned, shall be under any liability in respect of any such information, advice or assistance given to members. Members are advised to consult qualified specialists for information, advice and assistance on matters connected with their cars at all times.

Back
Top