Richard Stephens reports
It’s quite a common problem for the fresh air fan to seize or fail. All the weather elements come through the grille below the front scuttle and, if wet and/or unused for a while, this can cause a seizure of the fan.
The fan has three settings. The first two settings have a resistor in series with the power supply to the fan, hence controlling its speed. You can tell when the resistor is engaged - when moving the lever the blue light on the right hand side should come on. The final setting has not resistor for maximum speed.
It’s not too bad a job to change the fan, especially if you buy a complete unit, which are available. Everything is done from under the front bonnet.
Un-pop the carpet and remove the four 10mm bolts holding the cardboard protection piece.
Pull the brake reservoir breather pipe off and remove the cardboard piece.
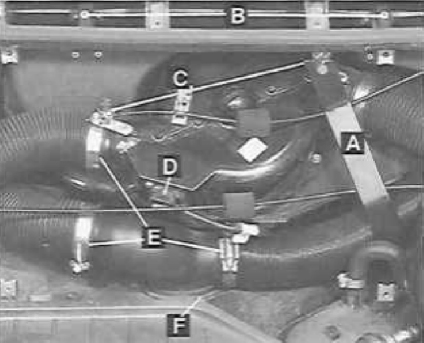
Next remove the two 10mm bolts holding the strengthening metal strip ‘A’ below.
At this point it’s worth removing the electric connector to the fan ‘D’. Check that these pins are not corroded. This was a problem on my connector.
Remove the four screws holding the metal grille in place. You can now see and remove the two bolts holding the fan housing.
Undo the jubilee clips from both sides and remove the ducting.
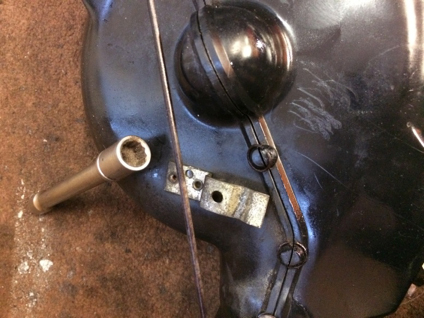
To remove the complete unit from the car the control wire near ‘C’ needs to be removed. The nut can be loosened on the lever allowing the wire to be withdrawn. The clip holding the wire in position needs to be removed. This can be a bit tricky. The bottom of the clip needs to be pushed out using a suitable screwdriver. Be careful it can spring out.
The drain hose needs to be removed. There is a clip that needs to be compressed so it can be removed.
The complete unit should be able to be removed from the car now.
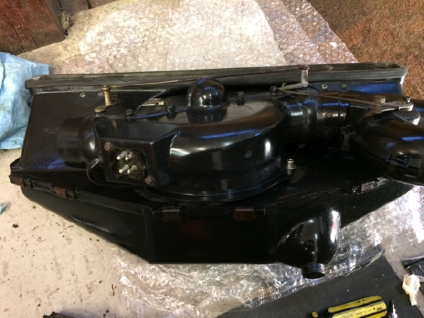
Next the fan housing needs to be removed from the main air unit. This is achieved by undoing the two small 8mm bolts holding the fan unit in place.
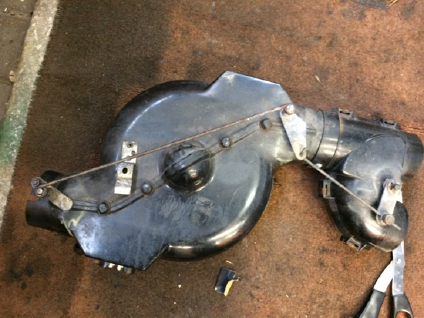
To get the fan assembly out, the housing needs to be split in half. There may be an extension pipe, right hand side of picture above, which has two screws either side, which needs to be removed first. Then there are quite a few circular rings, which can be popped out using a screwdriver or long nosed pliers. Be careful they may pop out quickly.
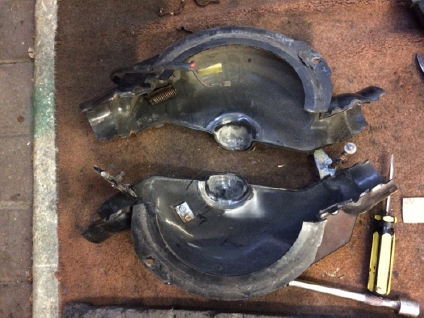
Now the fan needs to be separated from its holder. There are four clips holding it in place. These can be unclipped quite easily. Just note how they went on and keep them safe. If you are going to just replace the fan motor then this will have to be pressed out of the plastic fan assembly from the rear of the picture below.
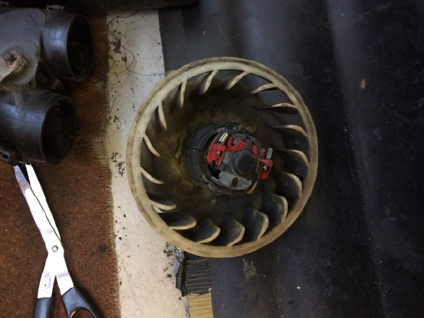
I was interested in finding out what went wrong with the fan motor. One side of the motor looked good as shown below:
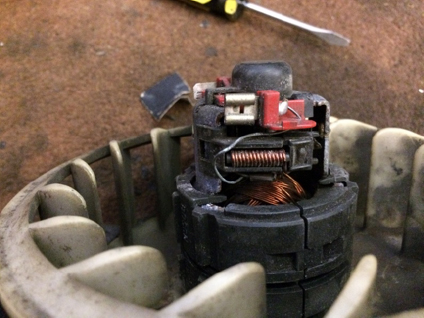
Note the horizontal coil looks in good shape. Now look at the one below:
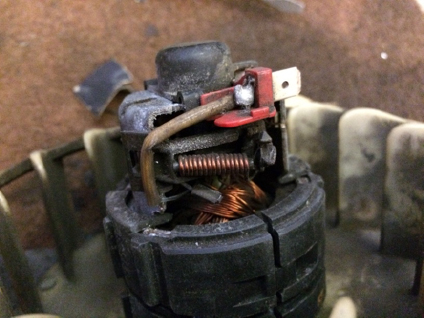
The plastic on the end has overheated and caused the coil to fail, hence causing the fan not to work. I ordered a complete fan unit with motor rather than mess with the old one. I will keep it since it’s the original. I replaced the old unit with the new one and assembled the fan housing.
I found using a 11mm socket quite useful for popping the small circular clips back onto the plastic studs.
The unit is now ready to go back in the car. I found that my connector had some corrosion on it as mentioned earlier. This needs to be cleaned to make good electrical contact.
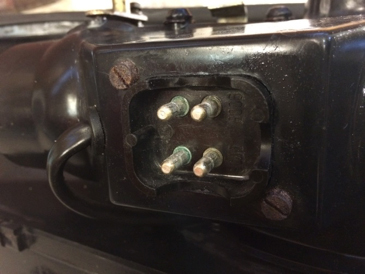
It’s worth checking the connector before you take the fan housing out if you are having trouble. It may just be a poor electrical connection. This is easily accessible when the fan housing is in the car. Locate the housing under the dash from under the bonnet, get it roughly in place and put the drainpipe in, then push the ducting pipes on and put the two holding bolts ‘B’ in place. Next connect the wire to the screw hole and put the clip ‘C’ in place. Following this, put the strengthening metal plate ‘A’ back in place and then the cardboard protection part. Do not forget to connect the brake breather pipe and then pop the carpet back in place. The fresh air fan unit should now operate with three speeds.
Job done!