Menu toggle

944 Turbo VEMS Installation and Setup

Eldavo

PCGB Member
Member
Hi guys, I've struggled to find any definitive setup guides for installing the VEMS standalone ECU and despite lots of assistance from the vendor I thought why not write my own to help others in the future (hopefully).

VEMS - Versatile Engine Management System is a one-size-fits-all standalone ECU system that needs considerable knowledge and expertise to set up and configure for specific requirements. Thankfully, Peep Päädam from Estonia knows exactly what he is doing and sells what he markets as a "Plug and Play" system for our cars (covering NA and Turbo). He will configure the kit to your requirements, with such extras as Coil on Plug, boost solenoid, bigger injectors, etc. I ordered the standard kit with Bosch LSU wide and sensor and MAC solenoid valve, it cost me about £1100 IIRC. Peep's email address is peep@vems.ee - he's happy to answer innumerate questions via email or can set up a Skype call if you prefer.

An important point to make at the outset is that the kits are made to order, expect a 5-6 week lead time, and due to Estonia's banking system not being on a par with our own, Peep currently requires payment via a bank transfer. I did my due diligence and spoke to others around the world who had ordered from him and felt satisfied but there was still some intrepidation when he emailed me the payment request from an online transfer service and I typed in my details.

He kept me up to speed with the progress of my order and asked some questions about my configuration and plans So that he could attenuate the tune to my requirements.

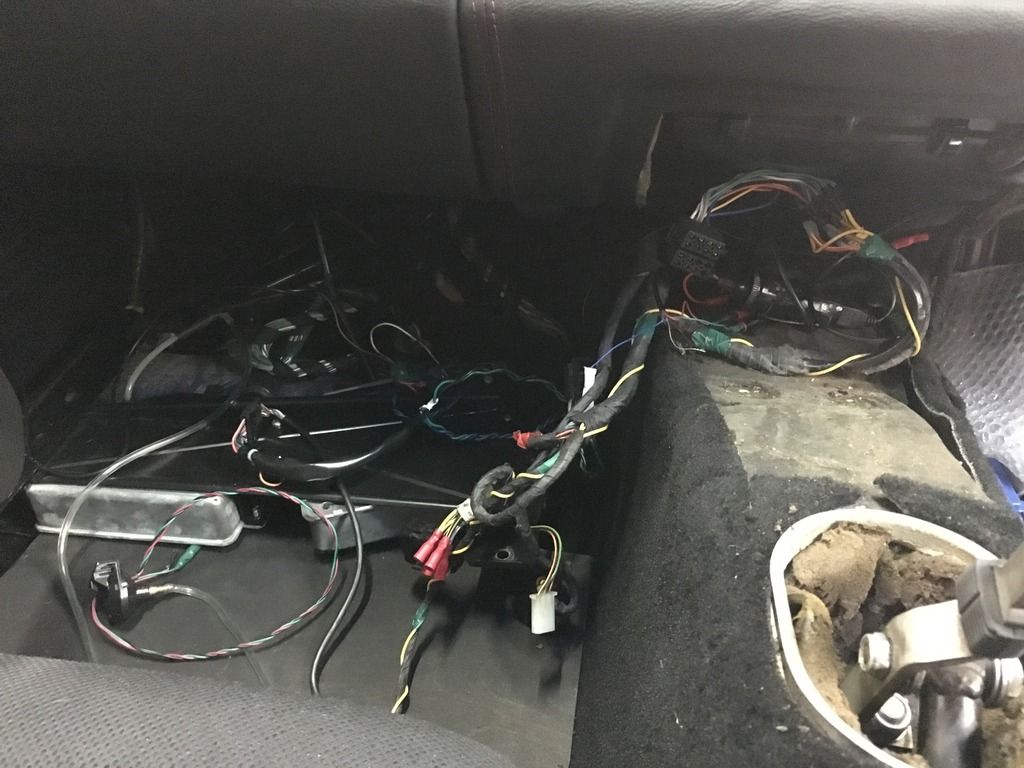
5 and a bit weeks later and my order arrived (via PhilKent on here as we ordered together) - as well as the kit elements there was a packet of spare pins and connectors, a couple of sheets of paper with pin outs and general info and the all-important +5hp sticker!

I had a good rummage in the box for the instructions, you don't get instructions. That's why I'm typing this!

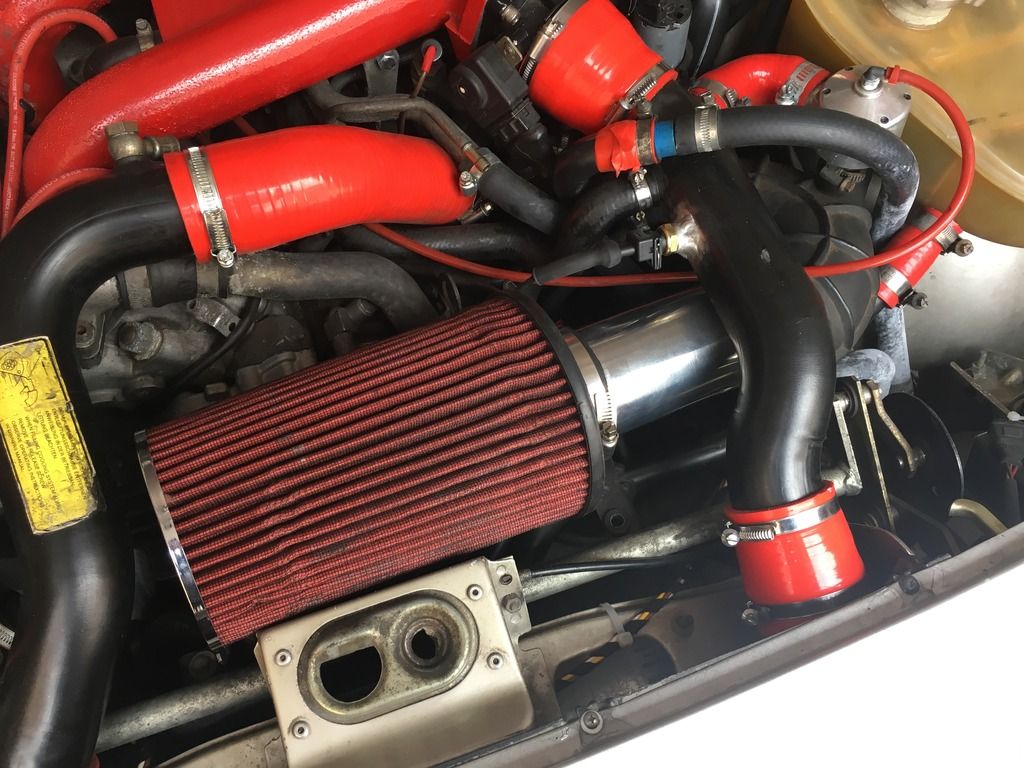
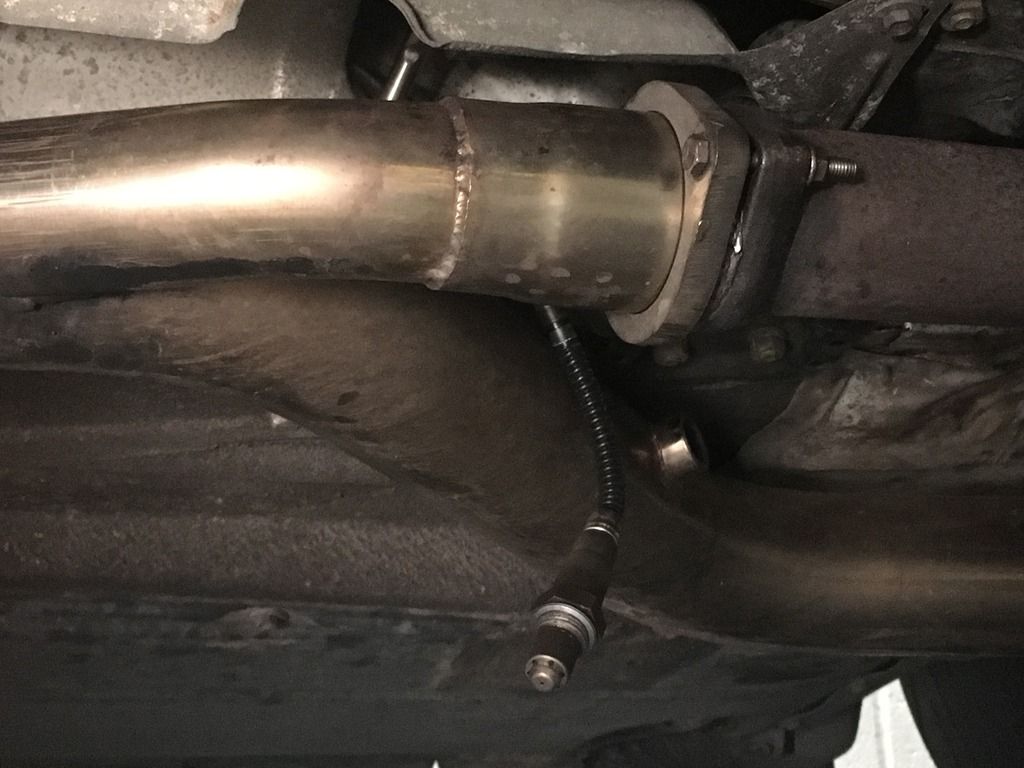
Prior to arrival, I'd had a bung welded into the intercooler-to-inlet-manifold charge pipe for the Inlet Air Temperature sensor. A 10mm bung was ordered off eBay and £20 saw it welded in place:

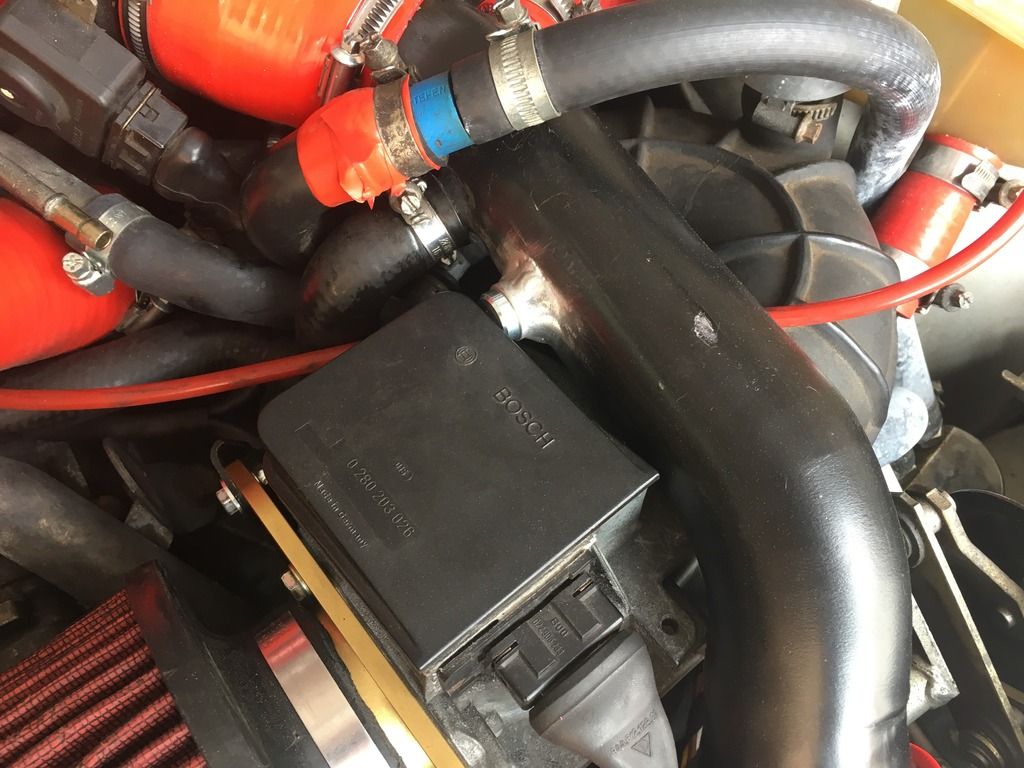
Here it is nestled behind the AFM with a plug in it for the time being:

892EECEC-E5FA-4C19-A467-5FF5F82A6943.jpg


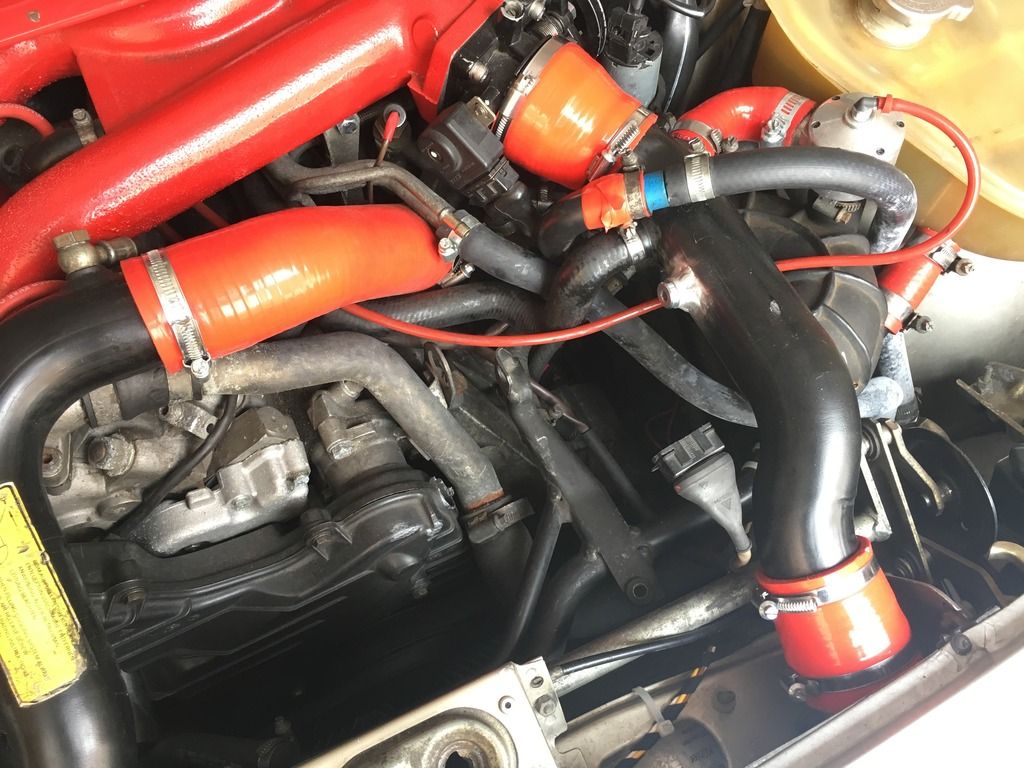
Air filter and AFM removed:

6D51994E-4627-4FB8-AC43-ACD873C56990.jpg


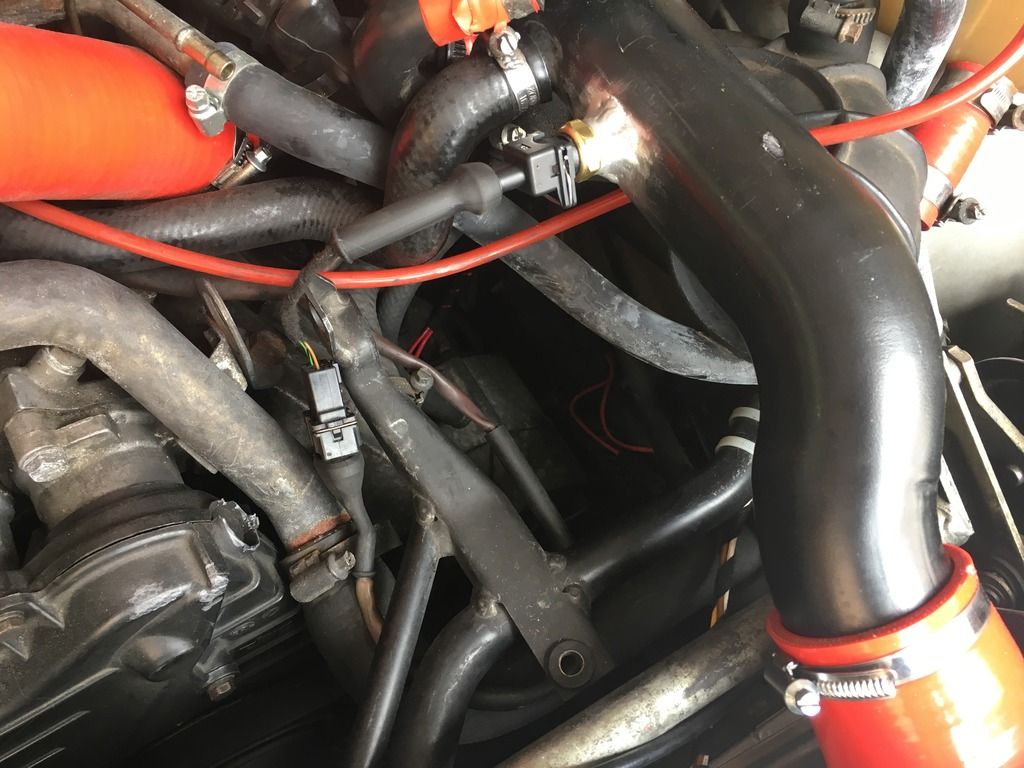
The IAT sensor screws in snugly and comes with a short adapter harness to connect to the AFM plug, so far so good:

B7E4688D-ED35-403F-B24B-E4FF83082540.jpg


A length of 3" aluminium pipe from ASH on eBay let me connect my air filter back up to the J-boot, I will be deleting the J-boot as some point in the future and relocating the air filter behind the headlight, I'll also be moving my oil catch can at the same time. It's currently under the passenger headlight mechanism where the old receiver dryer for the air con was (in case the eagle eyed where wondering what the extra hoses where for):

84DDBA18-D410-43BA-A9C5-508D0F27A2BE.jpg


As far as the under bonnet stuff was concerned, that was that - done!


The next step was installing the ECU itself and the wideband into the exhaust.

My car hasn't had a radio in it for all the time I've owned it, the previous owner removed that along with other bits. I'd decided to add a radio back in so figured it was about time to do a load of wiring rationalisation at the same time. This involved, de-grafting my Apexi AVC-R from the loom, clearing out some remaining old alarm cables, removing old boost pressure sensors, adding in an ISO connection for the new radio (along with finding all the speaker wires) and fitting the VEMS ECU. As it turned out, the ECU was the easiest bit!!!

In the thick of a rewire:

94BFEF44-2964-4687-8395-8C3654021053.jpg


Remove the mounting frame, unscrew the DME and KLR units, screw the VEMS ECU in place:

8823FCEA-EECC-4A0A-94B0-C576B68ABB79.jpg


The ECU comes with a wiring harness that plugs into the 2 connectors on the unit and has a DME and a KLR socket on the other end of it, it's as simple as plugging the harness into the ECU and then plugging the original connectors into the other end! There is also a lead that comes off the harness with a plug on it for the wideband sensor.

I had a new exhaust made a few years ago and had a wideband bung put in at the time (I've been running an Innovate AFR gauge - now removed). The old sensor wire was ridiculously long and I had it running through the engine bay but a bit of googling suggested that coming up through the shifter hole was the best method of running the wiring. I fed the wideband sensor down the front of the shifter foam:

59A9968D-E0E5-436F-85D1-4A153BFC151C.jpg


And it dropped neatly onto the heat shield below, I nudged it forwards a few inches with a long screwdriver until it fell down the front of the heatshield - perfectly where I needed it to be! A bit of rubber hose along the edge of the heat shield will prevent the wire from chafing and a zip tie held the wire neatly out of the way:

56F4B170-93A1-4D5D-BB07-C0E525161294.jpg


I plugged a serial to USB cable into the ECU and coiled it away in the footwell for possible future use and then put the mounting plate, wiring and kickboard back in place. No picture- looks like the footwell in your car!

I left the wideband dangling for now as a free-air calibration is required first.
 
I nicked my daughter's laptop as it has Bluetooth and a massive battery life (I've subsequently bought a Lenovo Miix laptop to leave in the car for tuning purposes so she could have hers back) downloaded the VemsHu program, powered up the unit and connected via Bluetooth. The passcode is set to 9111 - again, that would've been better written on the info somewhere rather than being messaged to me (admittedly it was in advance).

The first step was to calibrate the throttle position sensor, easy as pie - open the wizard, click zero, press the pedal all the way to the floor and click the button - click "Burn" to save the setting. (Important point, if there is a "Burn" button on a menu it turns red after you change a setting, click it or you won't save the setting to the ECU.)

Next was calibrating the wideband, again there is a wizard, open it up and click "calibrate" - it takes about 5 mins to heat the sensor up to temperature and then once complete, Burn the settings as before. On the subject of "Burn" - make sure you leave the sensor a while to cool down before crawling under the car to screw it into the exhaust.

Wideband calibration in progress:

55FA1267-39AC-4B82-9D05-014E87EDD423.jpg


The final setting is the req_fuel parameter, if Peep has supplied you with a set of bigger injectors then this is already set up but I was using my existing 55lb injectors so needed to populate this. Peep had prefilled the box anyway with an educated guess number (turned out to be pretty damn close) but I wanted it right.

It looks complicated "req_fuel = 6.49*(D/N/I)" but it's not!

D = engine displacement in cc
N = number of injectors
I = injector flowrate

So for me me it was 6.49 x (2500/4/577.5) so 7.02. Typed that in the box, hit Burn and then sat going through the settings for a while and familiarising myself with the program. I checked the rev limiter settings, they had been filled to factory specs but I lowered them slightly just in case, and although I'm going to initially tune and run on wastegate spring pressure only I set the overboost protection at 19.2psi - I'll be running at 18psi but wanted to allow for a little spiking without a fuel cut.

I then spent a bit of time going over everything as I was worried that it had been too easy, after checking everything a few times I turned the key and . . . .

It started, and sat idling away, albeit running very rich and lumpy - the gauges on the laptop screen all burst into life and I started to understand what was going on - I could see the fuel enrichment settings for a cold start and the idle improved considerably once the engine came up to temperature but it was still a bit rich and lumpy.

Next up was some on-road tuning using the Autotune feature, I'll cover that shortly but (spoiler alert) I had the idle sorted before I left the drive!
 
Guessing you'll have to re-tune when you delete the J boot and get a colder intake charge ?
 
blade7 said:
Guessing you'll have to re-tune when you delete the J boot and get a colder intake charge ?


Now I know more about the system and it's positive feedback I wouldn't be so sure that it's necessary, the system will factor in the colder air whilst referencing the Lambda lookup table and change the fueling and spark accordingly.

As it is, it is so easy to tune that I would retune it anyway - mainly as an excuse to disappear for an hour on a Sunday morning [:D]
 
blade7 said:
Did Peep think your injectors were OK ?


Yes. You can see the injector duty cycle as a percentage on the laptop display (and any saved log files). At 3bar fuel pressure I'm nowhere near troubling them - can't remember off the top of my head but I don't think they've even been near 50% yet.
 
Very interesting Dave-have to admit not familiar with this at all apart from reading the various forum posts-so appearing thick! what senses airflow now the barn door afm has gone?

I'm only familiar with the Hotwire sensor on my BMW 530D
 
I pulled out of the garage onto the drive leaving a big black soot stain on the cabinet behind the exhaust - yup running rich!

I clicked the "Log" button on the main screen to save a realtime log of my drive for potential future analysis and then opened up the Live VE analyser from the Tools menu. I went into the settings tab and left everything alone for now. You can specify a particular rpm range to monitor and tune or go for it all. You also set the resolution of the analysis too.

The system analyses the real time lambda reading from the wideband sensor and then cross references this with the tune that Peep has populated in the lambda table. Boost pressure is on the X axis and RPM on the Y axis. If the RPM gap between the cells is 300rpm and you set the resolution to 100% then for 3500 rpm it would allow for 3350 to 3650rpm to count towards the 3500rpm cell. Obviously, decreasing the percentage increases the resolution of the tune but you then need to hold that finer rpm for a few seconds so conversely you'll end up with a lower number of results. I left it at 100% for now.

So, at a given RPM and boost value, if the car is running outside the value in the reference table then the cell is red. Every time you cross over that cell, more info is gathered and changes made to bring the actual value closer towards the reference table value. The cell changes colour from red to a brown and then when it goes green it pops up "Tuned" and you're set. The idea is that you drive around with the analyser clicked on and the AutoTune clicked on and it sorts itself out. There is a filter that states the range lambda must be in and that the coolant temperature must be over 70 degrees C for this to be activated - I found that out by wondering why I couldn't get the analyser and AutoTune to switch on, engine wasn't up to temp!

As an aside, Coolant temperature is displayed on the laptop in degrees C, no more guessing what the gauge actually means! (I have a temperature sensor in my sump plug and will be wiring this to a spare input on the ECU to display Oil Temperature too in the future.)

Half an hour's drive (wastegate spring pressure only remember) left me with this:
938247E4-6CCF-4811-852A-F702186BB799.jpg


IMPORTANT - you need to go into another settings menu (I use the Launch Control menu as it is disabled so I don't muck anything up accidentally) and click the big red Burn button. It's a bit of an oversight that you can't Burn from the VE analyser screen and it would be far too easy to spend an hour or so populating the table and then fail to write it to the ECU because you forgot!!!

I sat on the drive and slowly increased revs to populate the non-boost cells until they were all green. Switched menus, hit Burn and ta-da my idle was now spot on. Drive time!

 
I pulled over every 10-15 mins to hit the Burn button and upload the results and every time I did, the car ran better, was more responsive and all was good in the world.

Time to populate those higher RPM numbers then, 3rd gear, onto the A1, hold the revs, 5000, 5100, 5200, FLASH, BANG, 4700. My sphincter has a very tight hold on my seat material. Everything still runs, car is fine, noise came from the very back of the exhaust. The definition of stupidity is doing the same thing and expecting a different response - pinned it again, same thing happened. Didn't poo myself this time though!

Kept it under 5000rpm on the way home and everything else was fine - strange. Emailed the log file to Peep and then swapped messages via FB Messenger that evening as he looked at it and talked me through it. "Primary Trigger Error" flashed up in the log file aka bad reference sensor reading.

Peep surmised (with the benefit of having seen this before) that the original reference sensor was losing signal over 5000rpm and while the original DME was blindly chucking everything in at this point, the VEMS system was switching off the plugs due to lack of input. The injectors were still firing, hence the flash and bang - I went out the next night to my local PCGB meet and ran a triggerlog whilst running over 5k, then I could look back at the log to confirm the sensor at fault.

I may or may not have done this on purpose while passing a Boxster with the roof down on the dual carriageway. Apparently the flame was quite impressive!

Ordered 2 new sensors, they arrive tomorrow - spent a couple of hours removing the old ones and the bracket as they were seized solid. In the meantime I've been understanding the boost control settings so should hopefully be able to tune higher revs and higher boost at the same time - hopefully this weekend.
 
Well done to you for going to the trouble of doing this write-up, I'm sure that it will help those who follow you with VEMS....well done sir...

Pete
 
The lambda based tuning does pose a question about how close the Lindsey/Rogue/Vitesse maps are ? I'd expect they have to be on the rich side on boost for safety. What's the target AFR on boost with VEMS ?
 
blade7 said:
The lambda based tuning does pose a question about how close the Lindsey/Rogue/Vitesse maps are ? I'd expect they have to be on the rich side on boost for safety. What's the target AFR on boost with VEMS ?


Yup - that was a key point for me, every other MAF setup just said "Let's look at what's going in, reference that to the internal map and do whatever corresponds to that input" - the VEMS unit also looks at what's going out via the lambda probe and is smart enough to change its parameters to suit.

My injectors are rated 55lb at 3.0bar - if my adjustable FPR is set to 3.1 bar I would be overfuelling with a different aftermarket setup, the VEMS software knows that I'm not hitting my lambda target and running too rich and compensates accordingly - clever penguins!

Here's the Lambda Table:

7FE1001D-D350-4C7B-ACC2-41C7A77E2EF7.jpg


As you can see here that at 220kpa and above (17.4psi) the lambda is 0.77 which equates to about 11.5 AFR using the following table:

IMG_0170.jpg


However, if you wanted to play you just click a cell and edit it (don't forget to Burn it though) - you can change the pressures on the X axis and the rpm on the Y axis by selecting them and editing them in the same fashion too:

06FB1641-509E-455A-B4BF-81B253686364.jpg

 
When not tuning you can hook up to an Android tablet or phone via Bluetooth and run the VemsHu app which displays anything you want in real time. You can have any combination from one massive dial to a combination of little ones or digital displays.

I don't own have an Android phone or tablet so I bought a Double-Din Android head unit - remember all that wiring earlier and the addition of an ISO connector? I also fitted some Alpine speakers in the doors, cut holes for them in my carbon door cards, wrapped them in a leather kit (they were a bit scuffed and yellowing) and put some OEM grilles on.

Used a sheet of carbon fibre to mount the double DIN cage in the centre console:

BBB51175-7EB8-4050-8F98-6C7B36F14183.jpg


Install with all the wiring in place:

4B12EF67-226E-445B-ABFB-A7086B24A440.jpg


Ta-da!:

178C5572-3DB7-49B8-8D7B-D835526B3D76.jpg


Greetings from Newcastle:

F17F8D10-9A1D-402B-93A5-ADF237EC3B34.jpg


And the important bit:

EE69610C-303B-4F21-B5A9-E0D0EB0C1B23.jpg


CFDA37CD-4960-4EAA-8425-38701B013102.jpg


And then after a parts order arrived, I filled that blank slot with an OEM 1988 USB mount, option code N0-W4Y:

BB054FAB-15CF-4721-888C-3179D98D1BCC.jpg


blade7 said:
Which adjustable FPR are you using ? I think my fixed pressure one may be on the blink.


I think it's a Syvecs one, I can't really remember. Has a NPT fitting on the side and I have a gauge on there.
 

Posts made and opinions expressed are those of the individual forum members

Use of the Forum is subject to the Terms and Conditions

Disclaimer

The opinions expressed on this site are not necessarily those of the Club, who shall have no liability in respect of them or the accuracy of the content. The Club assumes no responsibility for any effects arising from errors or omissions.

Porsche Club Great Britain gives no warranties, guarantees or assurances and makes no representations or recommendations regarding any goods or services advertised on this site. It is the responsibility of visitors to satisfy themselves that goods and/or services supplied by any advertiser are bona fide and in no instance can the Porsche Club Great Britain be held responsible.

When responding to advertisements please ensure that you satisfy yourself of any applicable call charges on numbers not prefixed by usual "landline" STD Codes. Information can be obtained from the operator or the white pages. Before giving out ANY information regarding cars, or any other items for sale, please satisfy yourself that any potential purchaser is bona fide.

Directors of the Board of Porsche Club GB, Club Office Staff, Register Secretaries and Regional Organisers are often requested by Club members to provide information on matters connected with their cars and other matters referred to in the Club Rules. Such information, advice and assistance provided by such persons is given in good faith and is based on the personal experience and knowledge of the individual concerned.

Neither Porsche Club GB, nor any of the aforementioned, shall be under any liability in respect of any such information, advice or assistance given to members. Members are advised to consult qualified specialists for information, advice and assistance on matters connected with their cars at all times.

Back
Top