Menu toggle

Cat - Manifold flange bolts arrrrghhhh

Laurence Gibbs

PCGB Member
Member
I have just fitted a new gasket and bolts to cure a blow in that area. What a horrible job[:mad:] Not helped by the fact that most of the bolts and nuts in the exhaust area seem to corrode away. I eventually had to drill them and then hammer the old bolts out.
Given that the other side is in similar condition but not blowing yet , does anyone have a easier method ?
 
On my 986 2.5, the original 'bolts' were actually press-in studs with flat round heads. They did not have hex bolt-heads. They also had serated shafts which were interference fit in the flange holes. 1) Grind off the nuts and remove the cat complete. Leave the back box in place. 2) Take the flange to a strong metal-working vice and using a socket as a spacer behind the stud head, push the stud out the way it came in. You might need a little heat to persuade it. 3) Hitting it with a hammer will bend the flange - they are quite soft and will be difficult to seal like that. 4) The original replacement bolts are difficult to get - using the part number at the dealer you just get normal hex-head bolts. Cheers, Jules
 
I used the term bolt , as that's how it's described in the workshop manual and PET. But your absolutely correct they are more of a stud with interference fit . Mine had lost there heads almost completely so it was difficult to know exactly what they looked like .And so i expected a bolt ! How did you get the cat out without removing the back box or the lamda sensor ? I tried several ways and just could'nt find a way without removing the sensor or box or suspension parts, none of which i fancied doing ! Not sure i'd describe the exhaust flange as soft! Perhaps mine had work hardened but it never bent and I had no trouble resealing after. The studs themselves took several drill bits as they had hardned too.
 
hi, When I did mine, most of the round stud heads had smoothed off almost completely - they were flush with the flange! Remove the back wheel and support the car in three places on stands. If you grind off the three nuts that connect the cat to the manifold, then remove the 2 x connector sleeves on the connector tube between the cat and back box (I had to cut these off because they were so rusted - and they are only cheap to buy new... use an angle grinder to cut a slot in the sleeve and then 'peel' them off) - then remove the short U shaped exhaust section (cat to back box). Undo the two bolts/nuts holding the cat to the chassis. Now disconnect the Lambda probe plug and you should be able to guide the cat + lambda out rearwards. Then you take it all to the vice... I initially mounted the flange in the vice and whacked the stud with a hammer - the stud didnt move but I saw the flange bend slightly, so I had to re-straighten it. Then I used the 'press' method described above which worked on all 6 studs I had to replace! Cheers, Jules
 
I wonder did you do both sides? and if not which side was it you did? Reason i ask is that i did do all of what you described but i could not find a way of getting the cat out(either the flange fouled the cv joint drive shaft or the lamda did !), perhaps one side is easier to remove than the other due to the symetrical layout? My sleeves came off easily but i had to remake the bracket that holds the cat to the back box. If i had been able to remove the cat I would have done exactly what you did and took it to the vice or my press and pressed them out, just i could not see a way of getting the cat out without removing the lamda from the cat or removing the backbox. Thanks for the reply.
 
My local exhaust centre charged me £20 to replace the bolts on the cats, it was middle of winter and I was very happy to pay[;)] ...Unfortunately for me 6 months later the exhaust started to blow again but this time at the joints to the back box as the clamps there had corroded away, I ended up stripping everything off and replaced all the clamps, gaskets, heat shields and for good measure the 2 Lambda probes, but at least it was summer by then. The cats will come out with a bit of twisting and turning but once there out consider using some proper 8mm nuts & bolts to secure the heat shields rather than tin spring clips Porsche use.
 
Laurence, I did both sides, but I think for the LEFT hand side I removed the Lambda probe prior to removing the CAT from the car. I cannot remember if the CAT would come away with the probe still in place. The one on the RIGHT hand side definitely comes out without the need to remove the lambda probe. Here are some pics I took at the time at the start (no I do not store my car in salt water overnight, but you may think otherwise!!): [link=http://img.photobucket.com/albums/v727/jcorallo/porsche/exhaust/IMG_1497.jpg]http://img.photobucket.com/albums/v727/jcorallo/porsche/exhaust/IMG_1497.jpg[/link] [link=http://img.photobucket.com/albums/v727/jcorallo/porsche/exhaust/IMG_1499.jpg]http://img.photobucket.com/albums/v727/jcorallo/porsche/exhaust/IMG_1499.jpg[/link] [link=http://img.photobucket.com/albums/v727/jcorallo/porsche/exhaust/IMG_1521.jpg]http://img.photobucket.com/albums/v727/jcorallo/porsche/exhaust/IMG_1521.jpg[/link] [link=http://img.photobucket.com/albums/v727/jcorallo/porsche/exhaust/IMG_1525.jpg]http://img.photobucket.com/albums/v727/jcorallo/porsche/exhaust/IMG_1525.jpg[/link] [link=http://img.photobucket.com/albums/v727/jcorallo/porsche/exhaust/IMG_1524.jpg]http://img.photobucket.com/albums/v727/jcorallo/porsche/exhaust/IMG_1524.jpg[/link] New bits: [link=http://img.photobucket.com/albums/v727/jcorallo/porsche/exhaust/IMG_1493.jpg]http://img.photobucket.com/albums/v727/jcorallo/porsche/exhaust/IMG_1493.jpg[/link] [link=http://img.photobucket.com/albums/v727/jcorallo/porsche/exhaust/IMG_1495.jpg]http://img.photobucket.com/albums/v727/jcorallo/porsche/exhaust/IMG_1495.jpg[/link] [link=http://img.photobucket.com/albums/v727/jcorallo/porsche/exhaust/IMG_1501.jpg]http://img.photobucket.com/albums/v727/jcorallo/porsche/exhaust/IMG_1501.jpg[/link] http://img.photobucket.com/albums/v727/jcorallo/porsche/exhaust/IMG_1514.jpg Note I had to cut one of the bolts shorter otherwise it was very close to the cyl head. Jules
 
interesting that you think you removed the probe on the left, as that's the side i had the problem with . Great pics Jules. Tony £20 was fantastic value, though i guess it depends on how easy they came out. Believe me when i say I TRIED to get the cat out. I tried twisting it everyway I could as i knew it would be easier to remove the bolts / studs on the bench.
 
I too have just had a massive fight with the flange fixings between the manifold/cat and rear section of the exhaust on my 2010 Cayman S. I have owned the car since 2015. When I acquired the car the clutch was shot and replaced under warranty which required removal of the rear section. At that time the original nuts were severely corroded, but the pressed in studs were deemed OK so only new nuts were fitted (with washers).

One manifold flange was showing signs of a blow at a recent inspection with the nuts and studs covered in a heavy rust scale suggesting that 4-5 years is the life of these bolts on a car which is used all year in all weathers, even if it is kept in a dry garage when not in use.

I decided to tackle replacement myself this time. The nuts were probably more corroded than the previous time, and the round heads on the studs were almost corroded away. The nuts were chiselled off (not too difficult with a good cold chisel) and the rear section of the exhaust was removed. Because I intended to replace the studs with stainless steel bolts I fabricated a simple fixture to press these out with the manifold and cats still attached to the car. The image attached below shows the remains of the studs and nuts alongside one of the stainless steel M8x30mm bolts and flanged nuts that have replaced them.

The parts list for the 987 does not list a replacement stud but shows a regular hex bolt (M8 x 30mm). If you want to keep the parts original I believe the same studs may be available under part number 948 111 217 20, but I assume these are steel so equally prone to corrosion.

 
Tracys very first Boxster started to blow pulled apart in fact I bought new nuts and bolts and a gasket took it to Quick Fit they heated the bolts knocked them out.

replaced with the new nuts and bolts and gasket .

Done in a few minutes.

Give us a drink sir £20.00

 
My "press" was a bit Heath Robinson using some scrap pieces of 4mm plate sandwiched together combined with some M10 threaded rod, nuts and a tubular spacer sleeve. The sketches below show the fixture required to press out the old stud (by tightening the two nuts on the top plate) and the bottom of the front flange spigot that the stud is pressed into.

Make the fixture

[ol][*]Make a tubular sleeve to fit over the head of the old stud. This needs to be 16mm ID and a max 24mm OD to fit over the spigot the stud is pressed into. Length should be approx 25mm. I used an old 17mm socket (3/8 drive) and drilled out the drive square to 16mm.[*]Ideally, for the plates use some 25mm wide x 20mm thick mild steel bar. Cut 2 pieces 9cm long. Centre punch positions for drilling two 11mm dia holes through both plates at 64mm centres. Also centre punch for drilling a shallow hole in the centre of one plate to locate on top of the stud being pushed out.[*]You will need some M10 threaded rod and 6 x M10 nuts. Cut two 12cm lengths from the threaded rod.[*]Assemble the rods onto the lower plate (the one without the shallow locating hole) tightening up the nuts either side.[*]Slide the upper plate onto the rods with the shallow hole on the bottom side and thread the last two nuts on to the top of the rods.[/ol]Moving to the car, once you get the nuts off, spray more penetrating oil onto the base of the studs studs to help loosen their grip.

[ul][*]Push the spacer over the spigot, in my case it fitted neatly, so did not need to be held in place while the press fixture was put in position.[*]Take the loosely assembled press and locate the shallow hole in the top plate over the end of the stud and then slide the bottom plate under the spacer.[*]Hold the two plates in place and spin the two top nuts down finger tight.[*]Tighten the nuts up uniformly to push the stud out.[/ul]In practice the amount of pressure required is quite high. If the stud does not budge with the clamping pressure, strike the top plate with a hammer to shock the stud loose (support the cat pipe with a length of wood when doing this). You will need a heavy drift bar to get a good strike on the topmost bolt.

 
Ian,

Thanks very much for taking the time to write this up. Much appreciated. Having done this on my gen 1 Cayman a few years ago, it was a pig of a job and took me about 10 hours and lots of cobalt drill bits plus a lifetime's supply of swear words!

The studs on my 981 Cayman are not looking good so I'll bear this in mind just in case!

Derek

 
Hayward & Scott in essex did my exhaust bypass recently (on a 2010 with 92k, so well rusted on). They got a torch and melted the ends of the bolts off and pressed them out. They do loads of these so I trust they've found the easiest way to do it, assuming you can get access to an Oxy-acetylene torch!

 
Hi everyone I was changing my spark plugs and coil packs because the coils were worn out and causing misfires. While I was changing them, I noticed the exhaust bolts were rusty. I'm thinking of changing them for new stainless steel ones. Is it better to change the nuts and bolts now before they get worse, or shall I wait until I need to change the exhaust?

 
The exhaust specialist I used told me not to use stainless bolts, apparently they will seize together (I'm assuming due to the heat cycles) which then leaves you with a bolt that still needs drilling/melting out, but this stainless bolt will be much harder to remove than a normal one.

I took a bag of stainless hardware with me for them to use but they left it all and just used regular bolts ... Bzp plated if I remember but I may be wrong

 
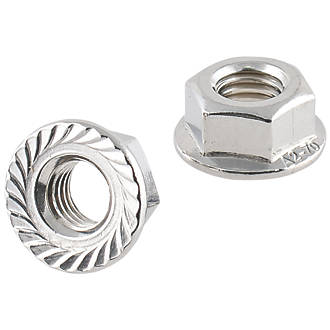
I agree that stainless steel nuts may seize on stainless bolts, but at least they will not corrode away. Use some copper based anti-seize paste on the threads during assembly to minimise the risk. The nuts I used were flanged with a serrated face to prevent loosening (see picture). If you need to split the joint at a later stage and the nuts have seized solid onto the bolts, the hex heads should still be intact so, with decent ring spanners/sockets, you will be able to twist and shear the bolts.

ae235


I had a similar problem on a 981 Cayman - I couldn’t face tackling the round nuts and the guys who did it for me similarly refused to use S/S. Thinking about it now, why do we not use brass nuts on carbon steel - like exhaust manifolds always used to be? Would be interested to hear any comments/opinions on this.

 
Took my Boxster S 986 2001 to Jaz Porsche and they have a standard set of exhaust bolts they offer as a replacement kit.

jazweb.co.uk Have a chat with Steve Winter. Hour job, all done.

Had to use oxy acetylene to warm brackets to get old corroded bolts out.


Posts made and opinions expressed are those of the individual forum members

Use of the Forum is subject to the Terms and Conditions

Disclaimer

The opinions expressed on this site are not necessarily those of the Club, who shall have no liability in respect of them or the accuracy of the content. The Club assumes no responsibility for any effects arising from errors or omissions.

Porsche Club Great Britain gives no warranties, guarantees or assurances and makes no representations or recommendations regarding any goods or services advertised on this site. It is the responsibility of visitors to satisfy themselves that goods and/or services supplied by any advertiser are bona fide and in no instance can the Porsche Club Great Britain be held responsible.

When responding to advertisements please ensure that you satisfy yourself of any applicable call charges on numbers not prefixed by usual "landline" STD Codes. Information can be obtained from the operator or the white pages. Before giving out ANY information regarding cars, or any other items for sale, please satisfy yourself that any potential purchaser is bona fide.

Directors of the Board of Porsche Club GB, Club Office Staff, Register Secretaries and Regional Organisers are often requested by Club members to provide information on matters connected with their cars and other matters referred to in the Club Rules. Such information, advice and assistance provided by such persons is given in good faith and is based on the personal experience and knowledge of the individual concerned.

Neither Porsche Club GB, nor any of the aforementioned, shall be under any liability in respect of any such information, advice or assistance given to members. Members are advised to consult qualified specialists for information, advice and assistance on matters connected with their cars at all times.

Back
Top